Free Text based TV-DVR using a TV Tuner Box and a Linux Storage Client
I got my hands on a great TV Tuner/Streaming Box called HDHomeRun (by Siliocndust) and this device captures the over-the-air TV signals through a normal antenna and starts a streaming service on the local home network.
I used to have small indoor antennas attached to each of my TVs at home and the over the air (OTA) TV broadcast signals captured by these indoor antennas were not that good. I wanted to have a powerful UHF/VHF antenna in my attic, but having all the TVs at home using that same antenna was a challenge. The HDHomeRun device solved this issue for me as I could connect that antenna to the HDHomeRun box and the streaming service it starts could be accessed and viewed by the Roku devices and TV apps. As a bonus I could watch live TV uisng that local streaming service on my phones, tablets, and the laptop with the HDHomeRun app.
There is a DVR (Digital Video Recording) service that we can use easily but after playing around the HDHomeRun device admin web page I could find the links that could be used to record the video streams using simple commands on a Linux client (on a NAS, Linux VM, or a raspberry Pi). By adding a cronjob and a shell script I could further improve this and schedule the recordings uisng a simple formatted text file.
I’m Going to explain it here on how to do it on a Debian VM. It would be same steps to do this on Raspberry Pi or a Linux based NAS device.
As the first step we could check the Channel Lineup page in the HDHomeRun. Here to see how we can record the video stream, as a test if we right click on the channel link of Channel 10.1 and copy the link address it will be like
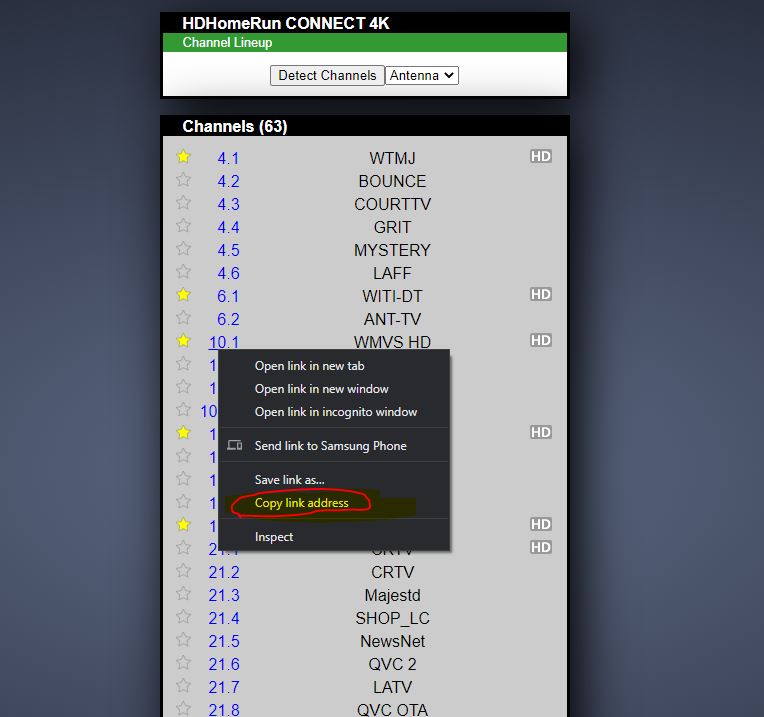
http://<HDHomeRun_IPAddress>:5004/auto/v10.1
We can use this link to download the stream using simple Linux commands. I’m doing these steps on a Linux VM, but as I said earlier, can use a Raspberry Pi or a Unix based NAS device for these next steps if it has enough storage to cater the TV recordings.
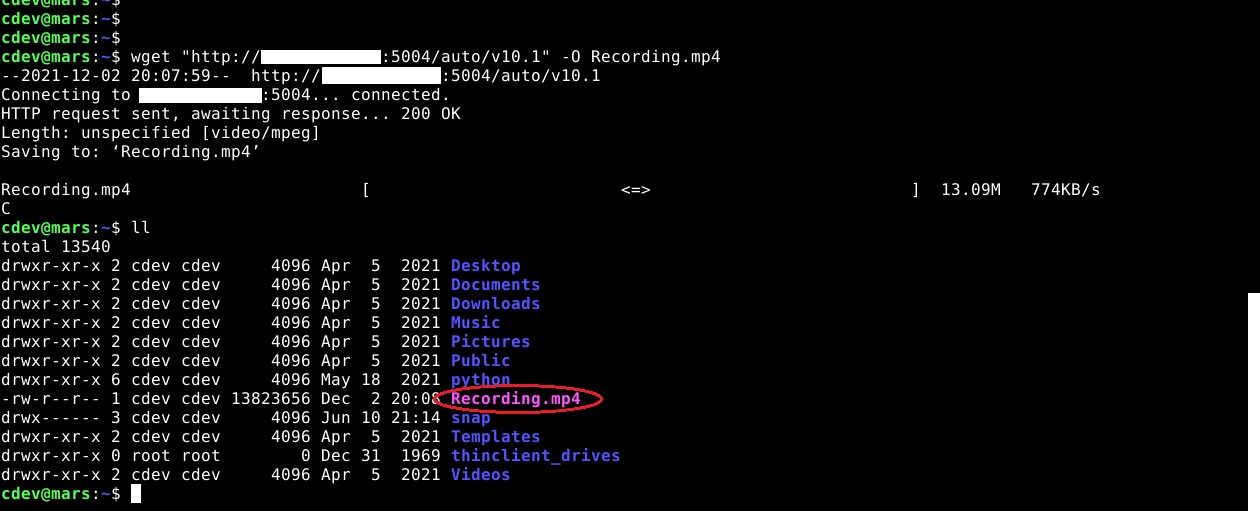
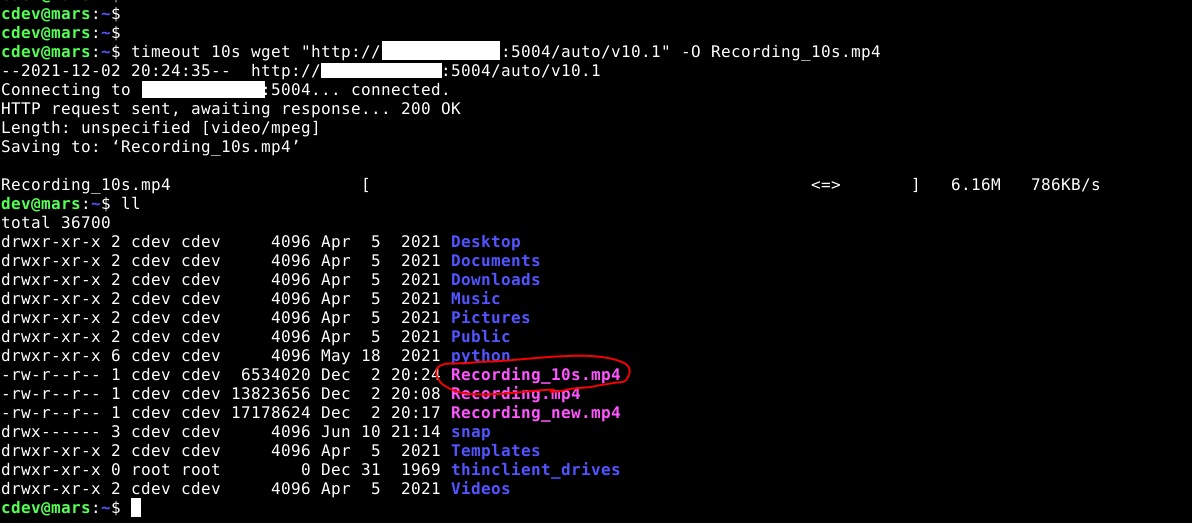
We can use wget command to start recording the video stream on this channel and stop the recording by hitting Ctrl+C.
We can use the curl command also for the same purpose; run the curl command to start the recording and Ctrl+C to stop it.
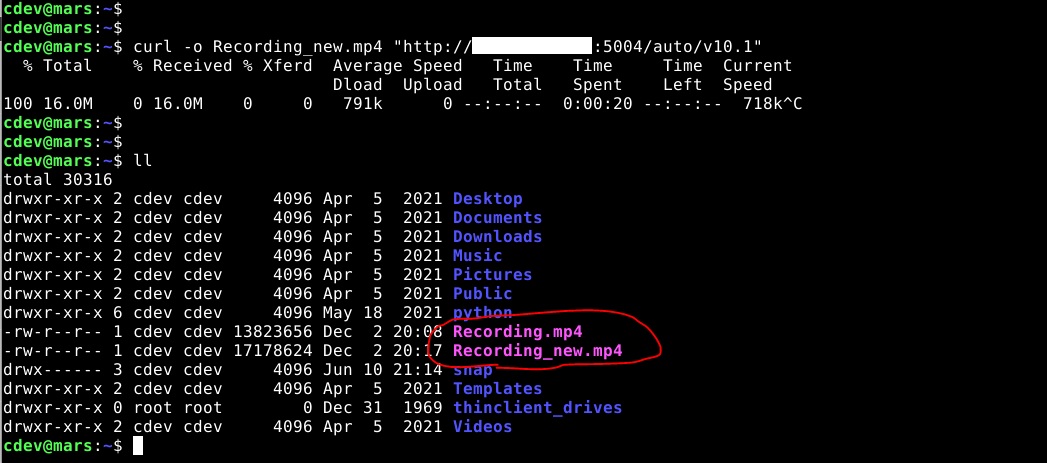
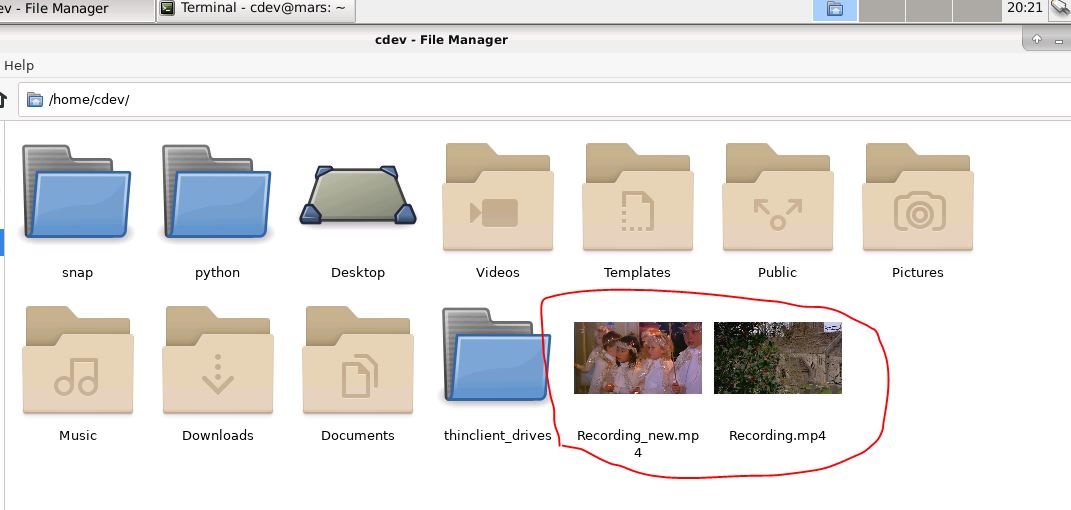
Here we have the MP4 video files created uisng the two tools (wget and curl).
We will use the wget command in our test further on.
If we use the timeout command before the wget command it automatically kills the wget process after a certain time that we can define. So we can control how long the recording would run without having to stop it manully.
Here I’m running the wget for 10 seconds. See the man page for timeout; we can define the timeout in seconds, minutes or even hours.
Now if we need to schedule a recording on a TV channel; for example news that broadcasts every day at the same time, if we know the start time of the news and the duration, we can schedule the recording using a cron job. Make sure to put the full wget and timeout executable paths in the cron entry. This could be found by running ‘which timeout’ and ‘which wget’.

If the news starts at 6.30PM (18:30) and runs for 30 mins, the crontab entry would be like.
30 18 * * * /usr/bin/timeout 30m /usr/bin/wget “http://<HDHomeRun_IPAddress>:5004/auto/v10.1>” -O <file_name>.mp4
This will record 6.30pm news (for 30 minutes) on Channel 10.1 for every day and create a file (<file_name>.mp4). The file will be replaced everyday unless you create more crontab entries to handle recordings for each day of the week or month.
Defining cronjobs for every record job was extra work and I wanted to refer the TV Broadcast Guide (for my area) on the web and record movies, shows and news as I wish without having to create a cronjob entry each time.
For this I created a text file which would be read by a cronjob every minute. This would be format of the text file.
MM-DD-YYYY-HH-MM MMm ChannelNo.X FileName EOL
Each entry would correspond to a recording job. If I want to record from 8PM (20:00) to 10PM (for 120 minutes) on December 21st 2021 on Channel 10.1 to the output file DecemberVideo.mp4 the entry for that would be as follows. Here EOL will just be an End-Of-Line tag that will be discarded by the cronjob script. Also to ensure the output video file won’t be overwritten by another later recording task we would add the date and time to the filename in the script.
Example file “/path/to/jobs/file/record-jobs.txt” will be like :
12-21-2021-20-00 120m 10.1 DecemberVideo EOL
Note: One thing I noticed with TV programs is, they tend to run 30-40 seconds more than the time allocated. It’s always better to put 121m there instead of 120m if you record a 2 hour program. Better to give it some more time and space on the disk rather than losing the final scenes of a show… 🙂
There can be multiple lines for various record tasks and the the cronjob script will read this file and do the recordings automatically.
Cronjob will be as follows, we schedule it to run every minute :
* * * * * /path/to/the/script/record-run.sh
“/path/to/the/script/record-run.sh” script (shared on GitHub) would be like :
#!/bin/bash
record_jobs="/path/to/jobs/file/record-jobs.txt"
record_loc="/recording/location"

while IFS= read -r line
do
        start_time=$(echo $line | awk '{print $1}')
        duration=$(echo $line | awk '{print $2}')
        channel=$(echo $line | awk '{print $3}')
        file_name=$(echo $line | awk '{print $4}')

        echo LINE : $start_time $duration $channel $file_name
        now_time=$(date +%m-%d-%Y-%H-%M)
        echo TIME : $now_time

        if  [ $now_time = $start_time ]; then
                echo "$now_time : Starting recording for $duration on channel $channel to $file_name"
                video_file="$record_loc/$start_time--$duration--$channel--$file_name.mp4"
                log_file="$log_loc/$start_time--$duration--$channel--$file_name.job"
                /usr/bin/timeout $duration /usr/bin/wget http://<HDHomeRun_IPAddress>:5004/auto/v$channel -O $video_file &
        fi
done < $record_jobs
Now the cronjob will run this shell script every minute and it will read the “/path/to/jobs/file/record-jobs.txt” every minute and start any jobs that are scheduled to start at that time.
For the above recording task example we defined in the text file, the output recording file would be :
/recording/location/12-21-2021-20-00–120m—10.1–DecemberVideo.mp4
You can get this filename anyway you want by changing the bash script. Or you can have a different/better format for the text file and change the bash script to read that format and work likewise. There might be further useful improvements that could be done here.
Anyway; now, no need to mess with the cronjobs to schedule recordings. We just need to enter the recording info on the text file (exact format should be followed for the job to work properly).
This “record-jobs.txt“ text file and the recording location can be shared or mounted on a NAS so you can edit the text file and schedule the jobs and view the recordings by accessing the shares, without ever needing to even login to the Linux host that runs these jobs.
The video recording location could be added to Plex, Emby or Synology DS Video. So, these recordings will be available through your local streaming services.
As always thanks for reading!